Friday, October 17, 2008

Move Floor Plan callouts to another view

Scenario: You have an (original) plan view with some detail / floor plan callouts. Then you have a duplicated view with some Floor plan callouts on it. Now you want to move all the Floor plan callouts from the duplicated view to the original plan view and delete the duplicated view.

I wrote about moving a detail callout view tag from one view to another yesterday.

Creating a reference callout will work, as long as you dont want to delete the duplicate views and you dont want the callout boundary and the crop view of the view are not coordinated / linked.

Instead:

  1. Open the particular Floor plan callout view.
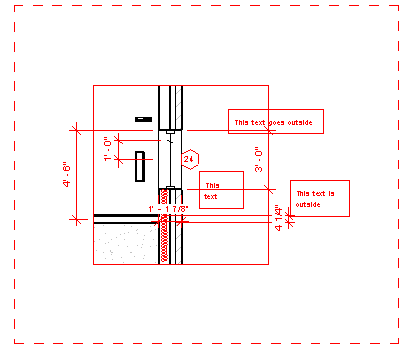
  2. Select all the objects that need to be copied from the Floor plan callout view along with it's view boundary. (Use Filter tool if needed)
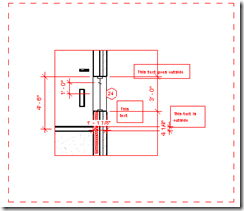
    image 
  3. Go to edit menu > Copy to clipboard.
  4. Go the the Original plan view and then to Edit menu > Paste Aligned > Current view.
  5. This results in:
    1. A new Floor Plan callout tag in the original plan view.
    2. The floor plan callout view will contain all the detail elements.
  6. Now you can safely delete the duplicated view. (This deletes the floor plan callouts in duplicated view. However, since we have already created new floor plan callout views, it should be fine. )
Thursday, October 16, 2008

Move detail callouts to another view

Scenario: You have an (original) plan view with some detail callouts. Then you have a duplicated view with some detail callouts on it. Now you want to move all the detail callouts from the duplicated view to the original plan view and delete the duplicated view.

The easiest is to cut and paste the callouts. However, this does not bring the detail elements added to the detail views like dims,  annotation, etc. So, not an option.

You could:

  1. Select the callout detail tag in the duplicated view and go to its properties and change the 'Show in' parameter to 'intersecting views'. 
    image  
    (This makes the detail callout tags visible in the original plan view and if you don't want to delete the duplicated view, you don't have to do anything else!)
  2. If you try to delete the duplicated view, the detail callouts that were created on the duplicated view will get deleted too.
  3. To be able to delete the duplicated view, without deleting the detail callouts, select the callout detail tag and go to its properties and change the 'Parent View' parameter to 'none'
    image

Now the detail callout should be visible in the original view and Revit will allow you to delete the duplicated view without deleting the details. This works only for the detail callouts.

You need to employ a different strategy to move Floor Plan Callouts to another view.

Wednesday, October 15, 2008

Windows Live Writer upload image error

This post is not about Revit.

I had written some time back about posting my blogs using Windows Live Writer. Incorporating screen captures from Revit was very easy using the WLW. However, recently I started getting error messages (The remote server returned an error: (403) Forbidden)

WLW has been saving all the images I uploaded in my blog to an album called "Windows Live Writer" in my picasa account. Once the number of images reaches 500, picasa does not allow anymore images to be uploaded. Hence, the error.

WLW cannot upload to any other folder. (The picasa plugin available for WLW is not suitable for screen captures.) Other options are to use another picasa account to upload images.

Based on the tip here, I have just renamed my picasa album "Windows Live Writer" to "Windows Live Writer 01" and it works great. Even though I have renamed the album, the 500 images that are already linked from this blog still to work fine (!)

sangath 290794

(this is a test pic)

Tuesday, October 14, 2008

Changing level to 100

This is a beginners tip.

Lot of firms want the Ground level (First Level) to be 100'. Or the actual level height given by the civil Engineer. Trying to change the level directly by editing the Revit level won't work. (It might actually move the model and so, all your view crops, etc may become wrong!)

Instead, while in an Elevation view,  go to Tools menu > Project position/orientation > relocate this project... and then click in the drawing area and move your cursor up and enter 100' (or whatever distance you want the levels to move)

Zoom all and view the levels, it would most probably not have changed. Select the level head and go to its type properties and change its Elevation Base to "Shared"

image

That should do it.

Friday, October 10, 2008

Missing Rotation Origin and active worksets

One of our project would not show the rotation origin, which looks like this,

image

while in the rotate command. The stuff it showed looked like:

image

When we aligned two objects, it would not show the customary lock too:

image

No clues yet.

However, when we tried to insert windows / doors, Revit would not show any preview, but would insert them anyway. But it would not show the inserted element! Yet, it shows the opening cut made by these inserted elements!

That's the clue. The current (active) workset is switched off!!!