Scheduling in Revit is very good and at the same time it is the worst. It does not allow copy and pasting of whole rows. Hardcore Revit fanatics claim that Revit has enough tools like filter / group to achieve the same, but this is far from the truth.
There is no easy way to highlight the changed cells. Revit 2008 does not allow to bold / strike through / color individual cells. This is really a problem when you need to highlight changes for revisions / addendums.
Clouding the cells in the schedule is worthless because if a scheduled item (like a door or room) gets deleted or added, the scheduled data is pushed up or down in the sheet, whereas the revision cloud stays put! (and so clouding the wrong cell!!!!)
If you don't keep track of the changes manually (yellow highlighter!) it becomes very difficult to check the parameters (for eg. in room finish schedule) that have changed since the last revision later. We do a work around that helps us.
1. export the schedule from the archived revit project. (1.xls)
2. export the schedule from the revised revit project. (2.xls)
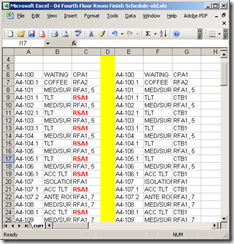
3. Copy and paste the contents from 1 to 2 on the same sheet but to the side, but maintain the same rows. In the picture below, the yellow vertical column divides the old and revised.

4. Create a simple "conditional format" in excel.
 5. This should highlight the changed cells. If any new item is added or deleted in the schedule data, then all consequent room numbers will show highlighted. Usually tweaking data in one excel row corrects it.
6. Now you have lost all the links from the revit model. You have to either print from excel or export this as an image and insert it in Revit to print from there!!!!!


No comments:
Post a Comment