Showing posts with label schedule. Show all posts

Monday, September 22, 2008

Schedule tips

Interesting thing I came across in Revit Help on Schedules today.

"Mouse-wheel scrolling is available in schedule views. Move the mouse wheel to scroll vertically. Hold SHIFT and move the wheel to scroll horizontally."

Horizontal movement is interesting!

Also, the vertical scrolling does not work if a cell is selected. (Horizontal still works!)
image

You have to unselect the cell by clicking on the "grey area" or select more than one cell (by clicking on one and dragging) for vertical scrolling to work.

Friday, August 15, 2008

Line breaks in schedule cells

You can enter data in a schedule cell with line breaks by using the "Cntrl-Enter" key combination whenever you need a line break. Revit does not show the text beyond the first line break in the schedule view, but the text looks ok in the sheet.

image

However, if we want to edit it later, it becomes a pain. When you select the cell, Revit shows only the first line. To see / edit the other lines, one needs to click inside the cell  and then press the "Down arrow" key to go to the next line.

image

If the down arrow is pressed when the cursor is at the last line in a cell, Revit moves the cursor to the next cell. This is quite irritating. To work around this, one could simply copy and paste the contents of the cell into a Text object. To do this, click inside a cell and then click and drag to select all the text in all the lines, then press "cntrl -c".

image

You create a new text object in any other view and paste the content of the clip board. After editing the text there, you can copy and paste it back into the schedule cell.

Copying and pasting from a text object seems to be time consuming, but will be faster than using "Cntrl-Enter" and "Down arrow" in some cases.

Wednesday, August 13, 2008

Attached wall height

This is quirky.

For instance, if we have a 15' unconnected wall and then attach

image

the top of the wall to a floor at level 1, which is at 10'. The wall properties still says that the height of the wall is 15'.

image

Revit also shows that the "Top is Attached". Changing this height in the properties does not change anything apparently. However, selecting the wall and clicking the "detach" button in the option bar,

image

to detach the wall returns the wall to the actual height shown in the properties.

(even though the wall height shows incorrectly while the wall is attached, the wall area, etc schedule correctly!)

Tuesday, August 12, 2008

Curtain Wall Doors and Levels

Curtain wall panel doors hosted in a curtain wall acquired the level from the level of the curtain wall. In this example the CW goes from level 1 to 4 and the doors are hosted at level 1, 2 and 3.

image

However, the schedule shows that all these CW panel doors are at level 1. This is the level the CW had as its "Base Constraint" when the doors were created.

image

Changing the base constraint of the CW to level 2 does not change the level value for the doors. There might be other better workarounds to show the correct level. The one that is shown here is long and winded. We used this one:

  1. Change the base constraint of the CW to the level you want to see in the schedule for a particular door. In this example, we made it Level 2 and then added a base offset of -10' , so that the CW looks the same after the level change.
    image
  2. Select the Door panel that is needed to be changed and swap this panel with the "CurtainWall : Curtain Wall 1" wall.  (This is a default CW type. It has no mullions / grids but only one panel)
    image
  3. Now TAB select the panel inside this "Curtain Wall : Curtain Wall 1" wall
    image
    and swap this with the door panel.
    image
    (You should NOT swap it with the whole "Curtain Wall : Curtain Wall 1" but the panel inside this CW.
  4. Now the schedule should show Level 2 for that particular door ("Curtain wall dbl glass"):
    image
  5. You might have to repeat relevant steps to change other doors. Changing the base constraint of the original CW back to Level 1 without and base offset does not affect the doors!

Monday, August 11, 2008

Multiply by count in schedules

When we try to multiply with the Count parameter in Revit, it spits out: "The field Count cannot be used in formulas.

image

For example, in a furniture schedule, after assigning $ values for various furniture, one cannot get an extended total for a set of particular items using the calculated value (= Count * Cost)

image

The work around is to create a calculated value named "ExtCost" (= Cost) which is equivalent to the cost parameter. The result looks like this.

image

Then go to the schedule properties > Formatting tab and select the ExtCost parameter and check Calculate Totals.

image

The result,

image

looks fine. But why do I have to do this?

Monday, June 16, 2008

Selecting elements with a particular parameter value

Revit allows us to select objects in many ways. Here is a situation we had the other day. We want to select all the walls that had the value "B3d" as their Mark value. We could not select the wall type > right click > and select all instances, because walls from different types had this parameter set to 'B3d'. What we did was to

Create a wall schedule

  1. grouped by the particular parameter (Mark value)
  2. NOT itemizing elements,

Now, whenever we select the particular row in the schedule to select all the elements that were grouped in that row get selected in the plan view.

image

Thursday, June 12, 2008

Totaling rows in a Schedule

The steps are described in Revit help: Adding Column Totals to a Schedule

For eg., to get the total square footage of all the rooms, start with a Room schedule.

image

The Sorting/Grouping tab in the View property of the schedule, has an option called Grand Totals. You have to check that.

image 

Then you have to go to the Formatting tab and select the specific parameter you want to be added ('area' in this case) and check the "Calculate Totals' option.

image 

And you get,

image

If you want to group get individual totals of bedroom, dining, etc., then you can go back to the sorting/grouping tab and change the sorting to Names and select the footer option like

image

and you get,

image

Monday, April 21, 2008

Comparing schedule changes in Revit 2008

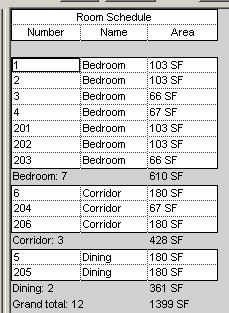
Scheduling in Revit is very good and at the same time it is the worst. It does not allow copy and pasting of whole rows. Hardcore Revit fanatics claim that Revit has enough tools like filter / group to achieve the same, but this is far from the truth.

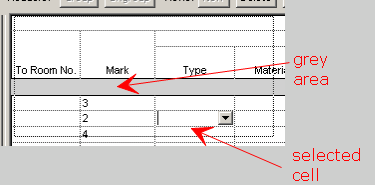
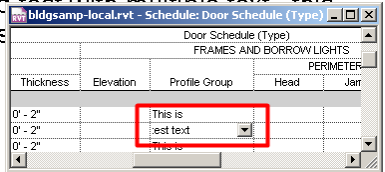
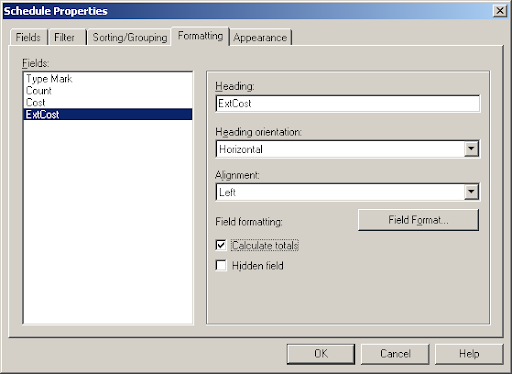
There is no easy way to highlight the changed cells. Revit 2008 does not allow to bold / strike through / color individual cells. This is really a problem when you need to highlight changes for revisions / addendums.

Clouding the cells in the schedule is worthless because if a scheduled item (like a door or room) gets deleted or added, the scheduled data is pushed up or down in the sheet, whereas the revision cloud stays put! (and so clouding the wrong cell!!!!)

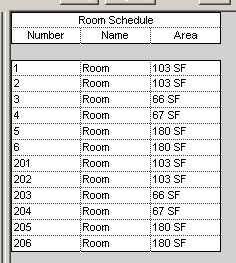
If you don't keep track of the changes manually (yellow highlighter!) it becomes very difficult to check the parameters (for eg. in room finish schedule) that have changed since the last revision later. We do a work around that helps us.

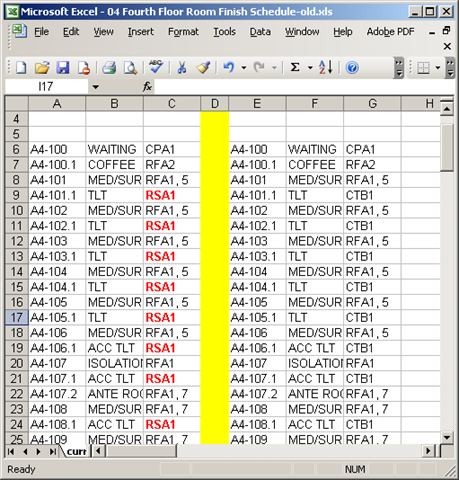
1. export the schedule from the archived revit project. (1.xls)
2. export the schedule from the revised revit project. (2.xls)
3. Copy and paste the contents from 1 to 2 on the same sheet but to the side, but maintain the same rows. In the picture below, the yellow vertical column divides the old and revised.

image
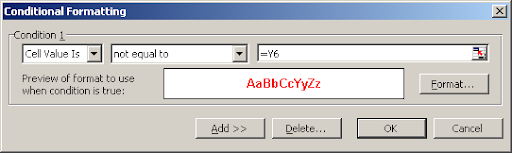
4. Create a simple "conditional format" in excel.

image 
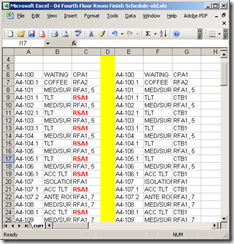
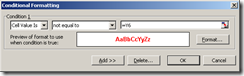
5. This should highlight the changed cells. If any new item is added or deleted in the schedule data, then all consequent room numbers will show highlighted. Usually tweaking data in one excel row corrects it.

6. Now you have lost all the links from the revit model. You have to either print from excel or export this as an image and insert it in Revit to print from there!!!!!