To create your own custom sheet / view organization, you can select the “sheet” category in the project browser and then click on the property tool. You can select any type other than the “all” and edit its folder and filter parameters. You can create groups (folder) of many of the parameters. 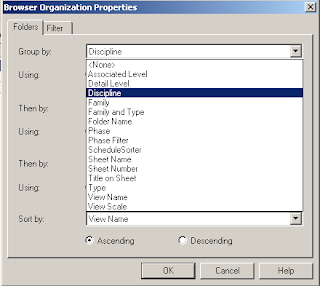
Here is a step by step guide to create a custom group. First we create a project parameter for “Folder Name”
Go to Settings > Project parameters > add one called “Folder Name” of Text type and select only the Drawing Sheets and Views categories to apply.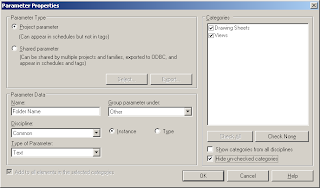 Select “Views” in the project browser and click the properties button.
Go to Settings > Project parameters > add one called “Folder Name” of Text type and select only the Drawing Sheets and Views categories to apply.
Select “Views” in the project browser and click the properties button.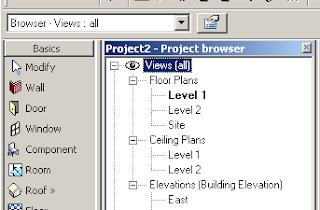 Hit duplicate in the type properties dialog box. (Duplicate is not available when the type “All” is selected. You have to select a different one) and name it “custom folders”
Hit the Folders button and select “family and type” from the drop down menu in the folders tab for “Group by” and select “folder name” from the drop down menu for “then by” (the project browser will be grouped by Family and type first and then by the folder name parameter we just created.
 Click ok twice to dismiss all dialog box.
Now your project browser should have changed and should have lot of ‘?’ marks. This just means that these folders are not yet named / created.
 To create a folder, right click and go to a particular view’s property. At the bottom the project parameter “Folder Name” that we had created shows up. Just type the name of the folder you want for eg. “Text views”.
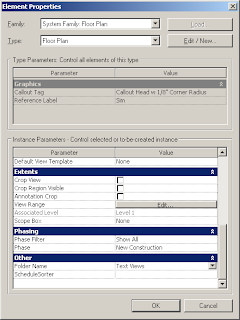 Now Revit will create a group called Text views and show the particular view within it. You can select a bunch of views in the project browser to move them to this folder or create another folder.
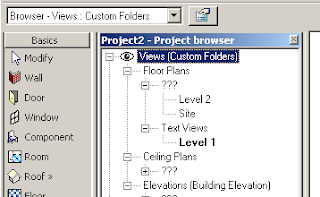


No comments:
Post a Comment