Showing posts with label revit. Show all posts

Wednesday, August 26, 2009

Show History and Backups behavior

Someone asked me a question if the File menu > show history command could be restricted to show only certain parts of the saved history of the RVT project. Typically a Revit project keeps the history of all the saves along with the comments (if any). Here is chart that shows the RVT behavior in various scenarios.

File type Show History Backups
Central File All STC info since its beginning No of backups based on the number entered while doing the first save as. (default 20)
Local File All STC and local save info since its beginning ditto
“detach from central” option while opening a file copies history from original file all backups lost from original
“save as” Retains only STC history info. all backups lost from original
“save as” with “Make this a central file after save” option Loses all history all backups lost from original

Thursday, April 9, 2009

Free Autodesk Revit Architecture software

I got an email from Autodesk saying:

“If you are one of the people that have been let go recently, you might be able to avail this free software offer from Autodesk. You can visit here to Sign up today and get more info!
Autodesk also offers Autodesk® Inventor® Professional, and AutoCAD® Civil 3D® software free.
You might be able to get free online training too at vBooks

Thanks Autodesk for this wonderful opportunity!

Tuesday, July 15, 2008

Equality constrain anchor

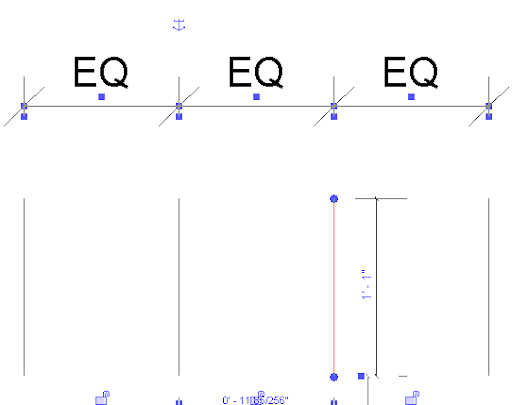
While creating a family with an equality constraint, sometimes, we want one of the elements to stay put and move the other elements based on the parameter changes. Revit has an anchor (image ) symbol that represents the object that would stay put.

When we select one of the equality constrained elements and Revit shows this symbol on the dim line. That will be the anchor line for the constrained elements. If one element is moved, all the other elements will be moved (to maintain the equality) keeping this dim line as the origin.

image

Pinning the element also gives almost the same result. We cannot move the pinned element, but an anchored element can be moved. (revit automatically switches the anchor to the neighboring element!)

Tuesday, July 1, 2008

Printing unreferenced view tags

The default print setup in the default templates in revit is set to print unreferenced view tags. Typically we dont print any unreferenced view tags (the sections / elevations / details etc that are called out but NOT placed (may never be placed) in sheets. The print setup dialog box has an option to turn this on or off.

image

The Hide ref/work planes option did not work for reference planes in Linked RVT files in Revit 2008. This has been corrected in the RAC 2009 version.

Monday, June 30, 2008

Removing Invisible Constraints

We had a situation at office: An user tried to move a wall and Revit moved two other walls along with it. We searched for any constraints or locks. None. Even if the constraining dimension is deleted, Revit shows a lock when the constrained elements are selected. We searched for the missing constraints using the technics here. To no avail.

Updated 20080724: There is a "Constrains" object in the Annotation category in the VG dialog box. May be constrains were switched off in that project...in such a case, it is easy to switch it on > select and unconstrain.

The project is quite complicated with phases, worksets, design options, etc. We just wanted to get rid of the constraint. To select and delete the invisible constraint:

  1. Selected the wall and moved it with the Disjoin option.
    image
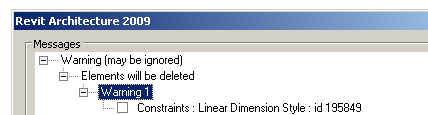
  2. Revit gave an error saying some objects will be deleted.
    image
  3. The constraining dim was the first one in the list. We could not check the box and delete it and we could not delete the other objects (like wall tags, etc.) along with them. So we noted the object id and canceled out of the command.
  4. We did: Tools menu > Elements ids > Select by id and selected the constraint and deleted it.
    image

Tuesday, June 24, 2008

copy paste detail lines - elements

Revit allows objects to be copied and pasted by using various options. Eventhough copying and pasting is very straightforward, Revit does not allow this operation all the time. If model and detail objects, dimensions are mixed, Revit does not like it. Sometimes, when we copy and paste detail objects, Revit does not do anything. This occurs sometimes with detail objects. If copy / paste does not work you can:

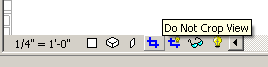
  1. Try the 'Do Not Crop View' option. This allows to paste the objects most of the time.
    image
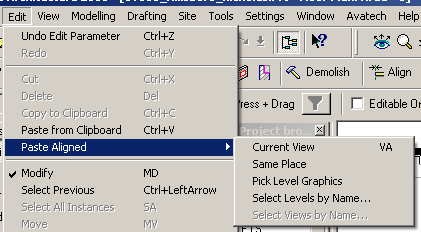
  2. Then try using the "Same Place" option for Paste Aligned. Eventhough the Revit Help file says "Same Place: Pastes the elements into the same place from where you cut or copied them.", this option works in other views too.
    image

Monday, June 23, 2008

Display blackout troubleshooting

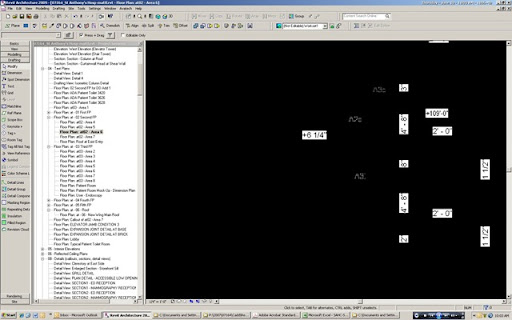
We recently upgraded a 120 MB project to Revit 2009. The upgrade went smoothly. Except for one person. His display blacked out every two hours. The Revit drawing area was fully black and when he hovers over the objects those objects would pre-highlight. Closing the project and opening it again would solve the issue. This is a pain, especially combined with a Serious Error. The display card we used was ati fire gl v 3350. This card was recommended in this thread at augi. (http://forums.augi.com/showthread.php?t=70735) Please read this thread if you have any hardware issues. Wonderful thread.

080619 Revit Error 01

image

Here is our chase. Yours might vary!

  1. Created a new local file. Didn't solve the problem.
  2. Updated the graphics card driver to the latest version.
  3. Second thought was to deactivate Open GL in Revit from Settings menu > Options...Graphics tab. The option was not available. (http://revitize.blogspot.com/2008/06/opengl-not-available.html) Even disabling the second monitor and checking the Windows Hardware acceleration didnt help.
  4. We switched off the windows Hardware acceleration in the Windows Display Properties > Settings tab > Advanced > Troubleshoot tab. But didnt help.
  5. We did get similar blackouts in ADT 2005 sometime back. In that case, we had to deactivate the support for hyperthreading to solve this. We had set the WHIPTHREAD autocad variable to 0. Since Revit didn't have such a command, we tried setting the AFFINITY in the Windows TaskManager and by using SMP Seesaw based on the "Revit and Dual Core" entry at http://revitcoaster.blogspot.com/
  6. Because we are running 32 bit version Windows, we had the 3GB switch on. This option, typically creates some issues (cannot access the internet, display issues, unpredictable Windows, etc.). We tried the USERVA setting along with the 3GB switch. Microsoft help on this issue here. This didnt help. Deactivating the 3GB switch altogether also didnt help.
  7. In the end, we just swapped a nVidia card and things are fine. (We have the "ati fire gl v 3350" in other machines, which work fine too!)

Friday, June 20, 2008

OpenGL not available

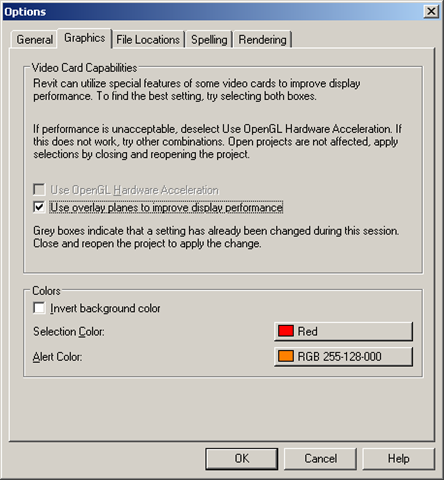
We have had issues on a particular computer with Revit 2009 display. When we went to turn off the Open GL option in the Settings menu > option command; graphics tab, it was not available.

image

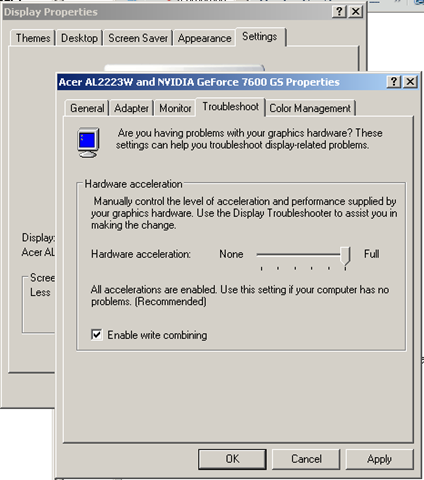
The graphics card supported OpenGL. If we had set NONE in the Hardware acceleration in the Windows Display properties (accessed from the Control Panel) (settings tab > advanced > troubleshoot tab), this can happen.

image

Autodesk also told us that the OpenGL option wont be available, if we had the 2nd monitor enabled.

Thursday, June 12, 2008

Totaling rows in a Schedule

The steps are described in Revit help: Adding Column Totals to a Schedule

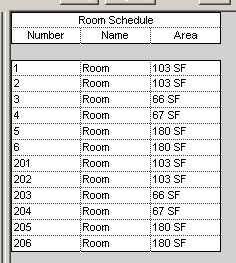
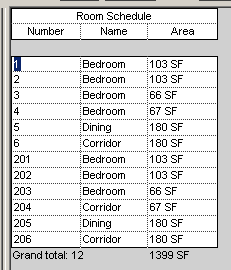
For eg., to get the total square footage of all the rooms, start with a Room schedule.

image

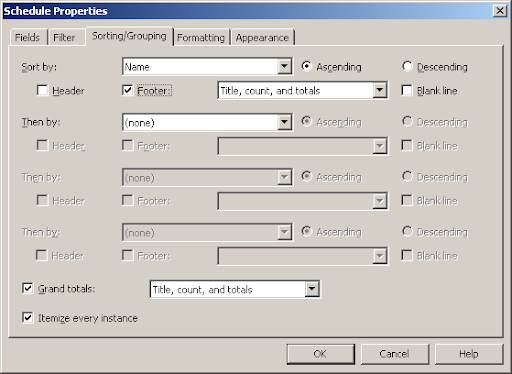
The Sorting/Grouping tab in the View property of the schedule, has an option called Grand Totals. You have to check that.

image 

Then you have to go to the Formatting tab and select the specific parameter you want to be added ('area' in this case) and check the "Calculate Totals' option.

image 

And you get,

image

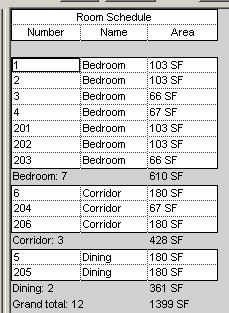
If you want to group get individual totals of bedroom, dining, etc., then you can go back to the sorting/grouping tab and change the sorting to Names and select the footer option like

image

and you get,

image

Wednesday, June 11, 2008

Custom Hatch pattern in Revit

Revit allows AutoCAD hatches to be used. The AutoCAD hatch pattern files have an extension 'pat'. They are just text files. They can be opened in a text editor like notepad. Like this Brick Flemish bong hatch.

*Brick_Flemish, Brick: Modular - Flemish bond
0, 0,0, 0,2.666666666
90, 0,0, 2.666666666,6, 2.666666666,-2.666666666
90, 4,0, 2.666666666,6, 2.666666666,-2.666666666

You can modify that to:

*Brick_Flemish, Brick: Modular - Flemish bond
;%TYPE=MODEL
0, 0,0, 0,2.666666666
90, 0,0, 2.666666666,6, 2.666666666,-2.666666666
90, 4,0, 2.666666666,6, 2.666666666,-2.666666666

'save as' for Revit. To create a Drafting pattern, you enter ";%TYPE=DRAFTING" instead of ;%TYPE=MODEL.

You can import this pat file from the property dialog box of any Filled Pattern

image

or from Settings menu > Fill Patterns...

Wednesday, June 4, 2008

Groups and Phases

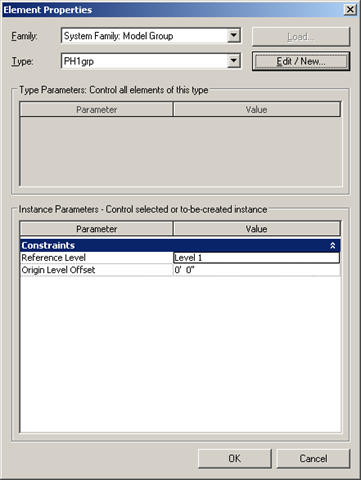
Groups, by themselves, don't have any phase parameter. So, you cannot create a group and then change it's phase.

image

However, individual members of the group (accessed via 'Edit Group' function) have phase parameters. (more detail about this below!)

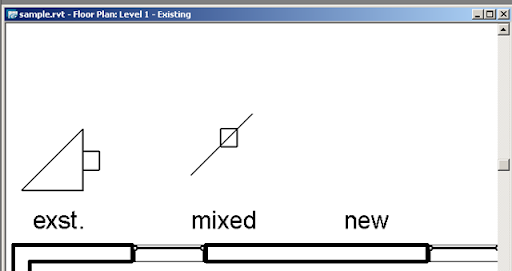
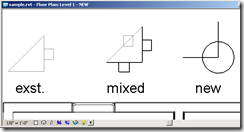
When you create a group, the group can have elements that belong to one phase or multiple phases. Irrespective of the phase of the view the Group was created, the sub elements of the group live in their respective phases within the group. The pictures below show an Existing Phase view (on the left) and a New Construction view (on the right) with the same instances of the groups.

image  image

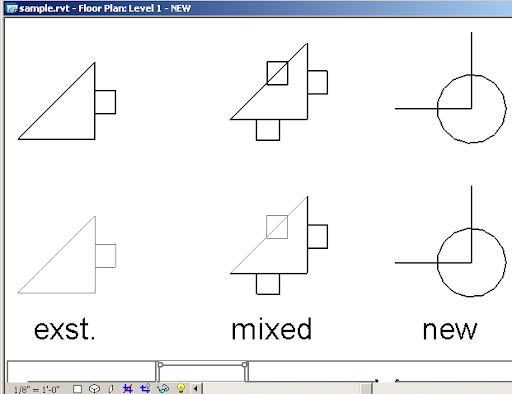
However, when you copy any group, the new instance of the group takes the phase of the current  VIEW (similar to the ROOM object).  This also means, that if a group has elements from many phases, all these elements become part of the phase of the current view. The pic below shows originals and copies of different groups, all becoming part of New Construction, which is the phase of the current view.

image

In RVT 2008: Changing the phase of the elements that comprise a group - using the Edit Group function - results in unpredictable results based on the phase of the current view. Moving objects from one phase to another does not get propagated correctly to other instances of the group. Depending on the current view, the phase parameter gets swapped / unchanged, etc.

In RVT 2009: Changing the phase of the elements that comprise a group - using the Edit Group function - changes only the phase of those particular elements in that particular instance of the group. The change does NOT get propagated to other instances.

  • The effective way to propagate changes in the phase of the elements is to create a new group with elements in different phases and then swap this new group with the old ones.
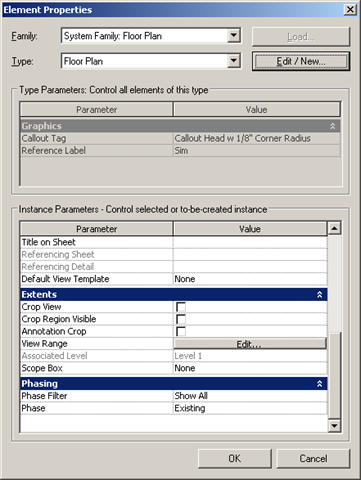
  • To assign a specific phase for a group, create it in the view which has this specific phase assigned to it.
    image
    You can create a group by copying, copy/pasting, mirroring, dragging from the project browser > Groups, etc.

Tuesday, June 3, 2008

Editing Level Heads text height

The text height of the level heads are a bit larger (1/8") than the default text height (3/32"). One of our teams wanted to change the height  of level heads to be that of normal text height. Here are the simple steps:

  • Get the name of the level head family that is being used in the project level heads.
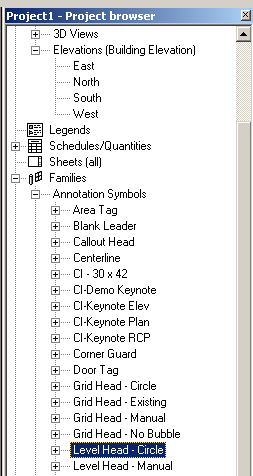
    image
  • Find this type in the project browser > families > annotation symbols >
    image 
  • Right click and select Edit.
  • Once in the Family Editor, change the height parameter in the Label type properties to 3/32"
    image
  • Load into project.
  • Now, if you want to have different size level heads in Sections, elevations and details, then you are on your own!

Friday, May 30, 2008

Hiding individual objects in linked Revit files

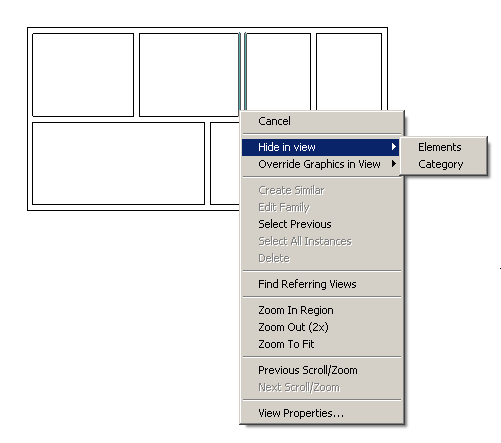
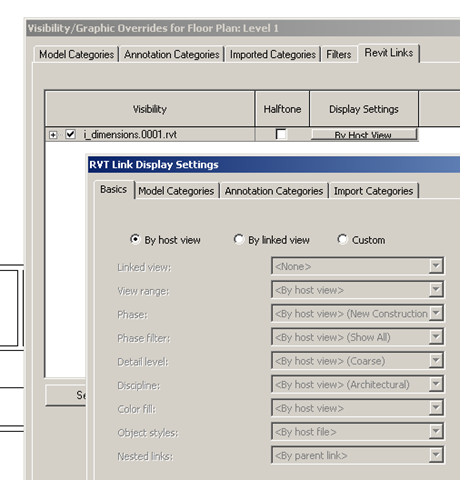
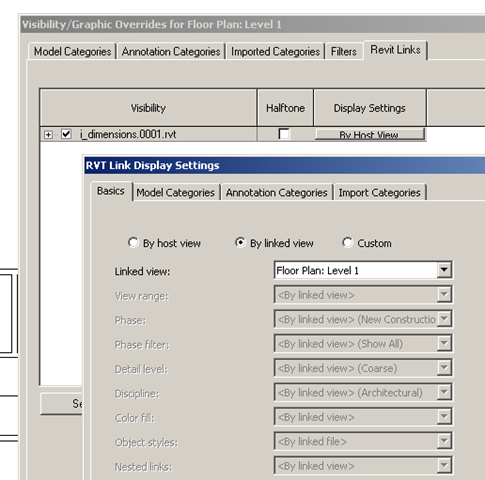
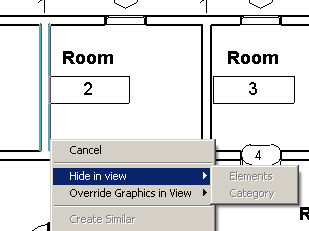
To switch off individual elements in a linked RVT file, you could TAB select a particular object, then right click, and select 'Hide in View'. Very simple. The irony is that this works only if you have set the display setting of the RVT link "By Host View" or "Custom" in the VG dialog box.

image image

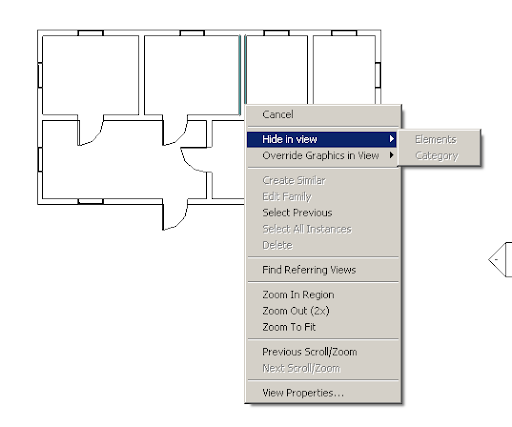
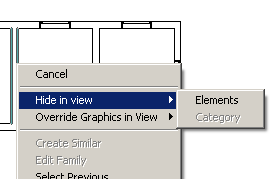
If you set the display setting of the RVT link "By Linked View" in the VG dialog box, then we don't get options in the "Hide in View" right click menu (see pic below)

image image

if you set the display setting of the RVT link to "Custom" in the VG dialog box and select a view for the linked view option, then we don't get options in the "Hide in View" too.

image image

However, when you set Linked View option in the basic tab to be None, then you can TAB select and hide individual objects.

image   image

Thursday, May 29, 2008

Filled Region not transparent

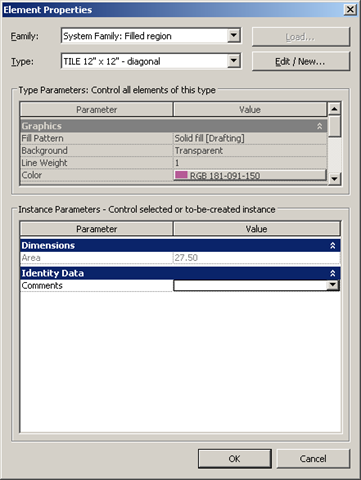
One of the nice features in Revit, is to be able to make a filled region (hatch) transparent or opaque. This option is in the type properties of the filled region.

image

However, one of our users complained that the filled region was NOT transparent even after setting this setting. See pic below. I was of the opinion that it was a display issue because of 'not enough memory'

image

However, after sometime, she realized that the view was in 'wireframe' mode and once she changed this to 'Hidden', the filled region behaved correctly. See pic below. Seems a bit counter intuitive (things should be transparent in wireframe and vice versa!) but ironically this works like this in both revit architecture 2008 and revit architecture 2009.

image

Wednesday, May 28, 2008

Zoom Sheet size

Because of this amazing zooming and panning capability in digital drawings, people loose track of the scale of the drawing (and the building!) Most of the times, this lack of scale understanding results in detailing / modeling more than necessary.

Revit has this rarely used command:

View > Zoom > Sheetsize (shortcut ZS in default installations)

This zooms the drawing window to match the print size based on the scale of the view. It is a good idea to check our model and the details based on this zoom factor. This habit also helps when we decide NOT to spend time to clean a wall joint properly, assuming that it may not look jarring in the sheet!

Thursday, May 22, 2008

The Holy Grail of IFC export / imports

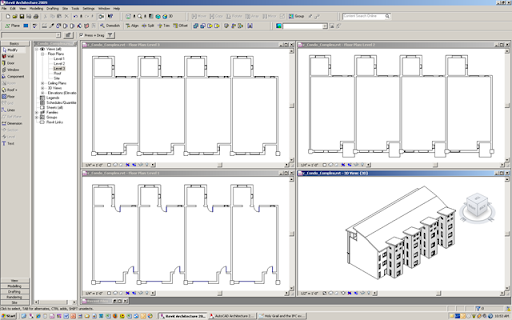
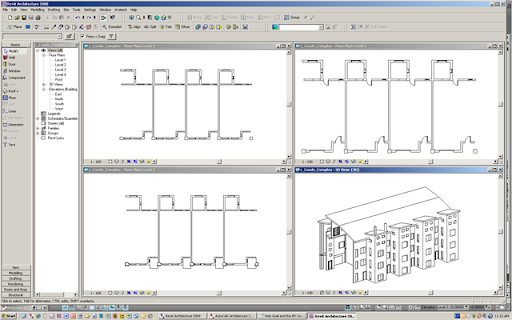
Prodded by a comment on the IFC export / import capabilities of ACA 2009 and RAC 2009, I exported the out of the box "c_condo_complex.rvt" file to IFC and imported it in ACA.

This is how it looks in RAC. (Three floor plans and iso view)

image 

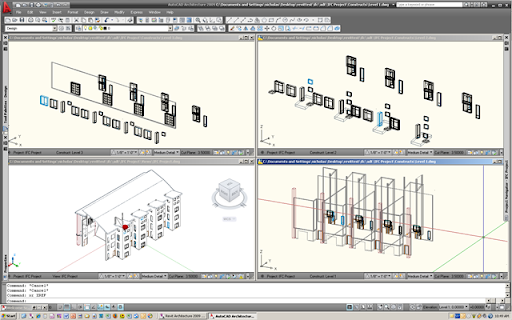
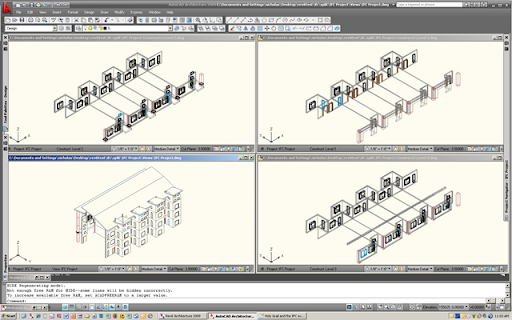
This is how it looks in ACA. (Three floor plans as iso views and a View dwg that has all these levels xrefed into them.)

image

I used the "create new project" option.

image

The results are NOT at all satisfactory. However, when I used the split walls and columns in Revit, I got this. I guess, this should work, if I want to give this IFC to my MEP consultants who are working with AutoCAD for MEP. It brought walls, windows, doors as ACA objects. (style names are IFCStyle1, IFCSTyle2, etc.)

image

If anybody has done this or use this function often, please enlighten me. Some issues:

  1. Some walls are missing.
  2. Roof and wall interaction is not handled properly.

Surprisingly, when I imported the same IFC file into RAC 2008, it looked like:

image

This result had similar issues like ACA. (same exterior walls missing, roof/wall bad improper interaction) It brought back same wall styles (as in RAC2009), etc. Which is great, but it seemed to happen only on the first floor level. Upper floor windows and doors have become in-place familes!!!

Tuesday, May 20, 2008

Design options and linked Revit Files

I was at a seminar presented by Phil Read the other day. He mentioned about using linked revit files to create design options. This seems like a very good idea.

The problems we have had with Design Options is that once we choose an option over other, Revit deletes everything related to the deleted option. Design Options also had its own rules and complicated the main project file with lots of views, objects, etc. Creating new central files out of the project to make 4 or 5 design option seemed to work ok, as long as the main project file is NOT concurrently developed.

Linking a separate RVT file as a design option does not clutter the main project file. It allows the main project file to be developed concurrently. After finalizing the option, we can just convert the linked file into a Group! (The new Revit 2009 feature of the linked RVT file being able to define a room, is a great improvement!) We can keep the other design option, even after we select the favorite one!

May be one day Autodesk will do away with the Design Option?!

Monday, May 19, 2008

Revit startup script to swap INI file

Last week I had written a blog about a simple installation script for Revit. Somebody had asked about a startup script.  We use a script to launch Revit.  This allows us to change the Revit.ini (if need be), keyboardshortcuts file, add API extensions, etc in individual boxes as and when we want it, even after the initial installation. This helps people using laptops too, making the whole process transparent. (The laptop person has to borrow licenses to use Revit fully or should have a standalone license)

To set this up, we typically create two INI files: Revit.ini - points to network resources and Revit.loc - points to local resources. Both these files are copied to "C:\Program Files\Revit Architecture 2009\Program". The script checks for a network file. If it finds it, (= network is available) then Revit launches with REVIT.INI. If the script does not find the network, then it renames REVIT.INI to REVIT.NET and then renames REVIT.LOC to REVIT.INI and opens Revit.  While in the business of swapping INI files, we also run a BATCH file whenever Revit is launched. Currently this batch file is empty, but we could add commands as and when we need them!

Currently, when an user opens a RVT file directly from Windows explorer, the startup script for Revit does NOT run. We have not YET gone that far to link the RVT extension, etc to go through the batch file, but encourage users to open Revit first and then open the project within Revit. Here is the sample batch file, please use it at your own risk.

**********************

@echo off
if not exist "Z:\REVIT\Support\RAC2009Start.bat" goto RevitnoNet

:RevitNet
call Z:\REVIT\Support\RAC2009Start.bat
if exist "C:\Program Files\Revit Architecture 2009\Program\Revit.loc" goto Revit
rename "C:\Program Files\Revit Architecture 2009\Program\Revit.ini" Revit.loc
rename "C:\Program Files\Revit Architecture 2009\Program\Revit.net" Revit.ini
goto Revit

:RevitnoNet
@echo off
cls
@echo.
@echo.
@echo.
@echo.
@echo Please wait... Network connection is NOT detected...
@echo.
@echo.
@echo Please open 'Windows Explorer' to check if Z drive is present.
@echo.
@echo.
@echo If you are working on a laptop and off the network then,
@echo.
@echo.
pause
if not exist "Z:\REVIT\Support\RAC2009Start.bat" goto Revitlocal
goto RevitNet

:Revitlocal
if exist "C:\Program Files\Revit Architecture 2009\Program\Revit.net" goto Revit
rename "C:\Program Files\Revit Architecture 2009\Program\Revit.ini" Revit.net
rename "C:\Program Files\Revit Architecture 2009\Program\Revit.loc" Revit.ini
goto Revit

:Revit
rem sTART REVIT
"C:\Program Files\Revit Architecture 2009\Program\Revit.exe.lnk" %1
exit

**********************

Monday, March 24, 2008

Custom Sheet / View Browser Organization


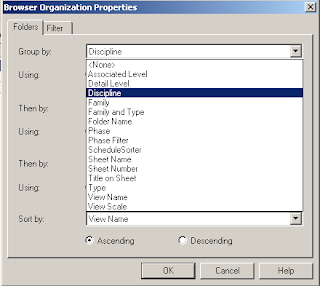
To create your own custom sheet / view organization, you can select the “sheet” category in the project browser and then click on the property tool. You can select any type other than the “all” and edit its folder and filter parameters. You can create groups (folder) of many of the parameters.
Here is a step by step guide to create a custom group. First we create a project parameter for “Folder Name”
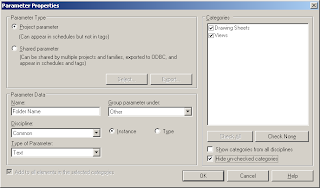
Go to Settings > Project parameters > add one called “Folder Name” of Text type and select only the Drawing Sheets and Views categories to apply. Select “Views” in the project browser and click the properties button.
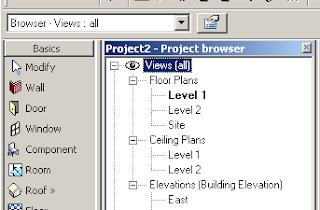
Hit duplicate in the type properties dialog box. (Duplicate is not available when the type “All” is selected. You have to select a different one) and name it “custom folders”
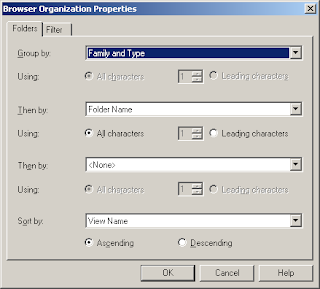
Hit the Folders button and select “family and type” from the drop down menu in the folders tab for “Group by” and select “folder name” from the drop down menu for “then by” (the project browser will be grouped by Family and type first and then by the folder name parameter we just created.
Click ok twice to dismiss all dialog box.
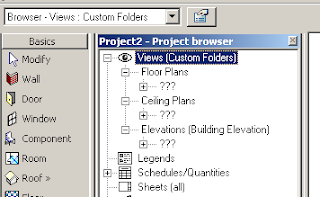
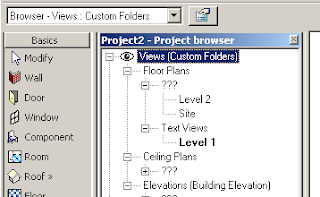
Now your project browser should have changed and should have lot of ‘?’ marks. This just means that these folders are not yet named / created.
To create a folder, right click and go to a particular view’s property. At the bottom the project parameter “Folder Name” that we had created shows up. Just type the name of the folder you want for eg. “Text views”.
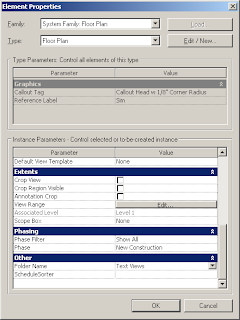
Now Revit will create a group called Text views and show the particular view within it. You can select a bunch of views in the project browser to move them to this folder or create another folder.