· Print window
· Duplicate the view; Crop it to suit your needs; then print current view;
It is always a good idea to delete this duplicated view after printing.· Another workaround is to use the “Print Visible portion of current window option”.

1. If the zoom is set to Fit to Page in the print setup dialog box, Print Visible portion of current window option will print all the visible portion of the current view.
2. If the zoom is set to a zoom scale in the print setup dialog box, and the paper placement option is set to center, revit will print a portion of the model (NOT just the visible portion of the current view) that would fit into the selected size of sheet, in the selected scale, aligning the center point of the view to the center point of the sheet.
3. If the zoom is set to a zoom scale in the print setup dialog box, and the paper placement option is set to offset from corner, revit will print a portion of the model (NOT just the visible portion of the current view) that would fit into the selected size of sheet, in the selected scale, aligning the lower right corner of the sheet to the specified corner from the lower right corner of the view.
· Batch plotting:
1. First, go to the one of the views or sheet that would be included in this batch plotting process.
2. In the print dialog box > Print range option, keep it to Current view.
3. Then go to print setup and set the scale/etc, as if you were printing only this view / sheet.
4. Preview the print.
5. If everything looks ok, then change the Print Range to “Selected view / sheets” and click select button.
6. Always check none before proceeding to build a new batch plot list
7. You cannot preview the batch plot prints. But since you had already previewed it in step 4, you are ok.
8. (If you are uncomfortable with this and really want to preview the whole batch plot set, you need to create DWF or PDF files)
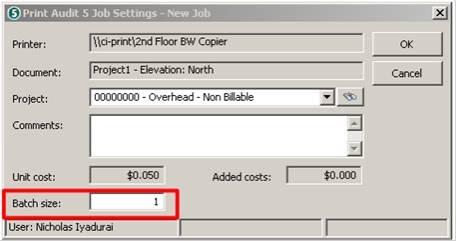
9. In the Print Audit dialog box, you can enter the batch size so that you don’t have to enter the info for every sheet / print.
· Issues:
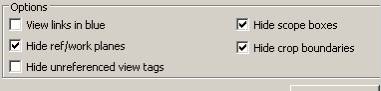
· To print or not to print certain elements, Revit has the following options.
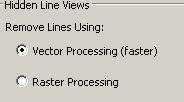
· If you see certain text / hatch objects / tags missing in the printed output (but was visible in the view), then you should select Raster processing. This takes more time (10 secs) but prints properly. Revit defaults to Vector processing.
· If printing crashes your computer or the Print server (no one can print anything to anything!!!@#%$$##!), then use Raster processing. Generally if you want to print a shaded color view from Revit (color shaded plans; rendered views, etc.) always use Raster processing.
· Revit defaults to “Fit to page” option in the Print setup dialog box. You might want to check this always before sending the print. Here zoom 100% would mean that the printed output will have the same scale as that of the View.

· PDF printing;
· Select a PDF printer first. Print setting would be similar to other printers. While making a Batch PDF print, you can combing all PDFs in one file or create separate PDFs for each view / sheet by selecting the option in the print dialog box.
· DWF printing:
· You don’t print to DWF anymore. You go to File menu >Publish DWF to create DWF. Similar to PDFs you can create one combined DWF or separate one for each view / sheet.


No comments:
Post a Comment